Setting up PPTP VPN account on Windows 7
The VPN setup on Windows 7 is pretty straight forward, please note that this how-to uses the built-in network setup right in Windows 7.
-
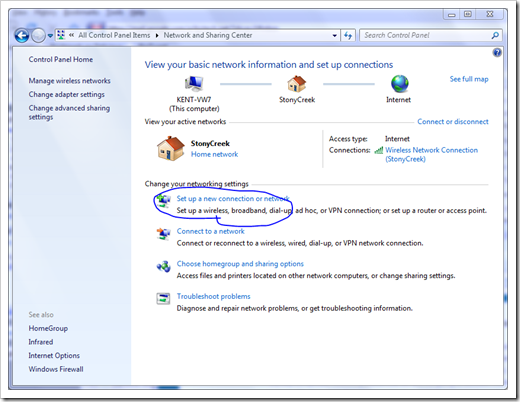
Open up network and sharing center from Control Panel, and choose Set up a new connection or network.

-
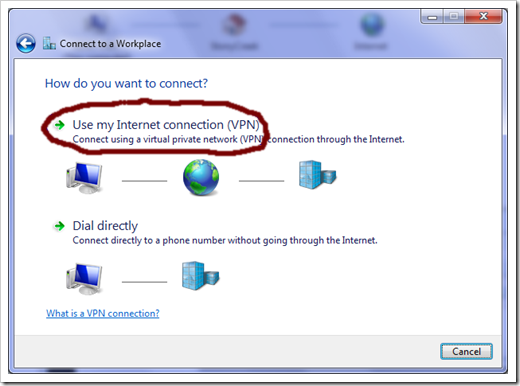
There are two options in the Connect to a Workplace window, you just need to pick the first option.

-
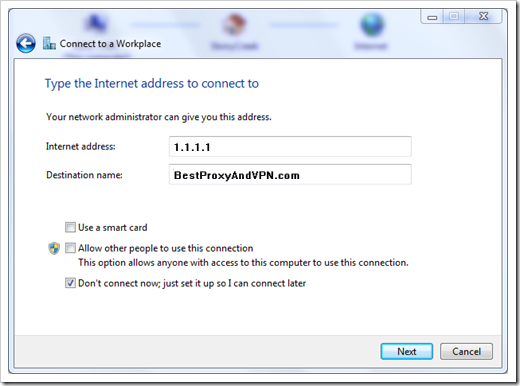
Type in the address of th VPN Server you have received for your VPN account (should look like VPN Server: x.x.com in your notification email) and BestProxyAndVPN.com as the name of the connection in the destination name box. And click Next.

-
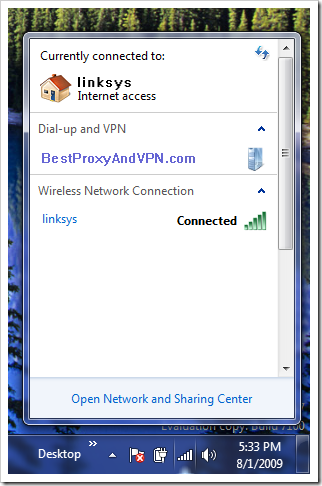
You can leave all user login info blank if you feel safe that way in the next window. And click Create. You’re all set if you see the next window as below.

-
To launch it, simply click the small network icon on the system tray at the bottom right corner, and pick the connection we just created from the popup list, and connect.

-
Type in your user name and password, and you are on your way connecting your BestProxyAndVPN.com VPN account. Please note that each VPN account you have has a different VPN username for each of your accounts so make sure you use the correct username (which is different from the one you use for member area access).

pptp vpn, vpn setup, pptp vpn setup, vpn configuration, windows 7 vpn, windows 7, vpn howto, win7


